MoodzDesign
613.290.8458
moodzdesign@yahoo.ca
  • Home
  • About
  • Blog
  • Showers
  • Engagement Dinners
  • Parties
  • Birthday
  • Corporate
  • Portfolio
  • Contact Us

Theatre House and Castle

12/18/2017

0 Comments


House

Last year I offered my help to create set decorations for my daughter's play at the local theatre. They need a house and castle...yikes. Always up for a crafty challenge.

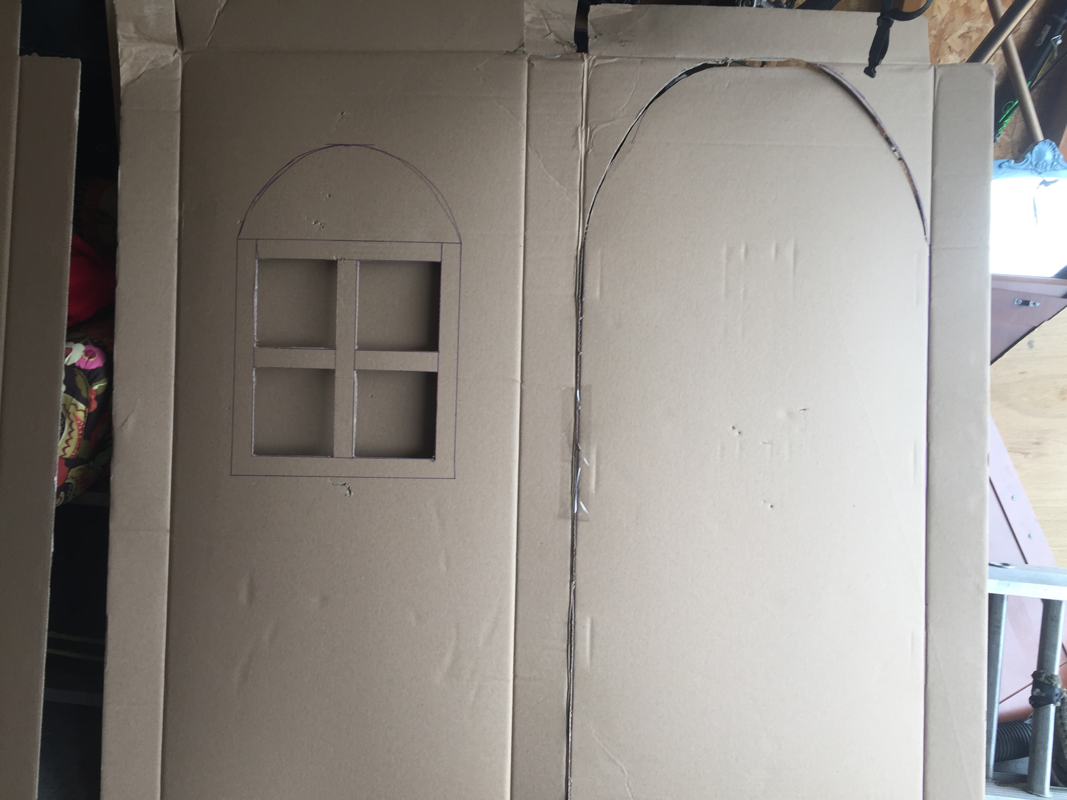
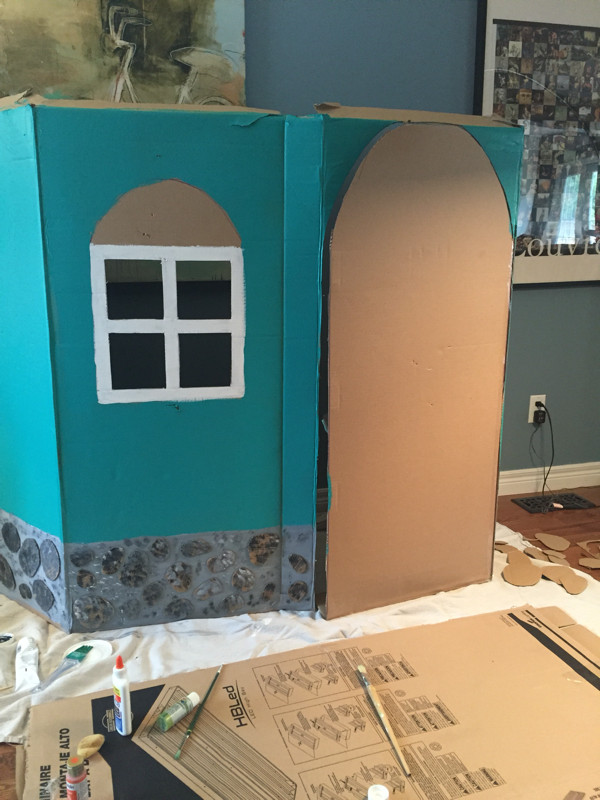
As you can see from the photographs below I use the largest boxes I could find and started cutting out a house. Since the play was a simple community children's play, the house didn't need to be very tall.

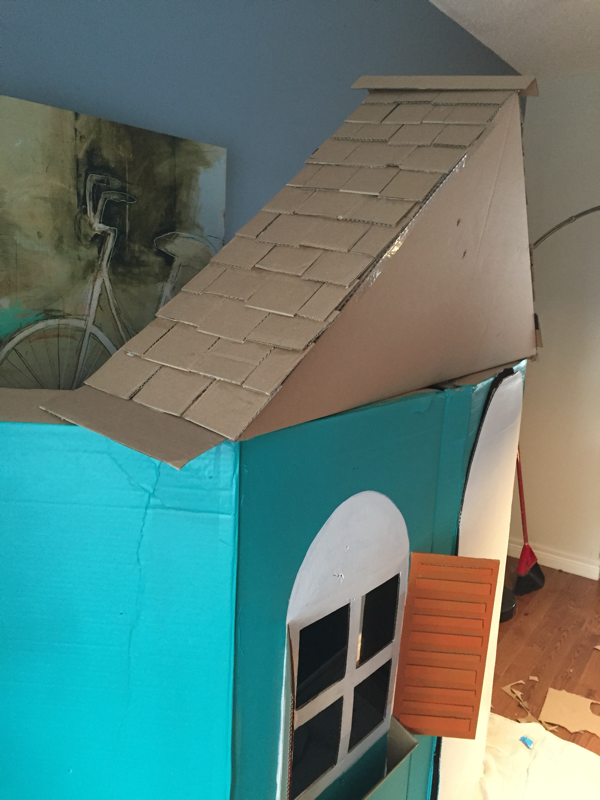
I cut out 4" strips of cardboard from other boxes i had and then cut the strips every 4" (give or take, it doesn't need to be perfect) to have roughly 4" x 4" squares. I did not use a ruler for the cutting.

I then glued them to my roof pieces to make them look like they were shingle pieces.

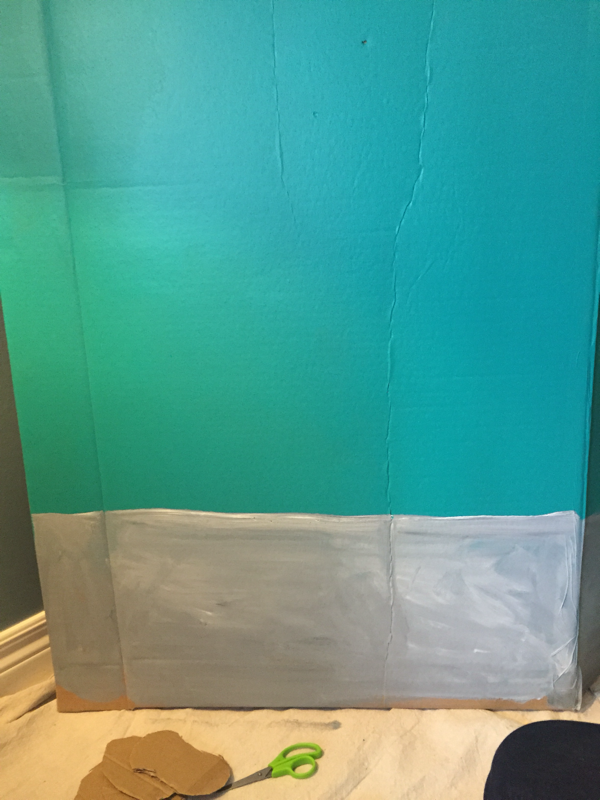
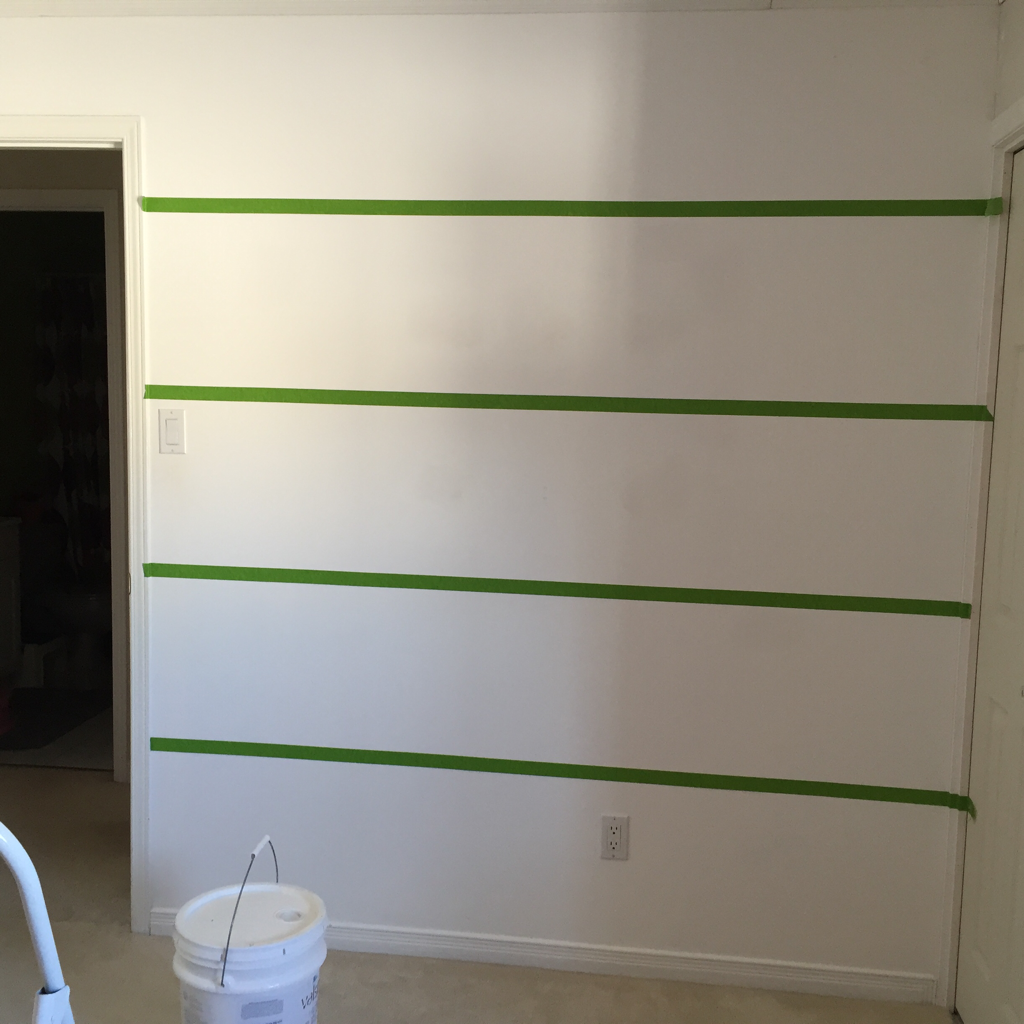
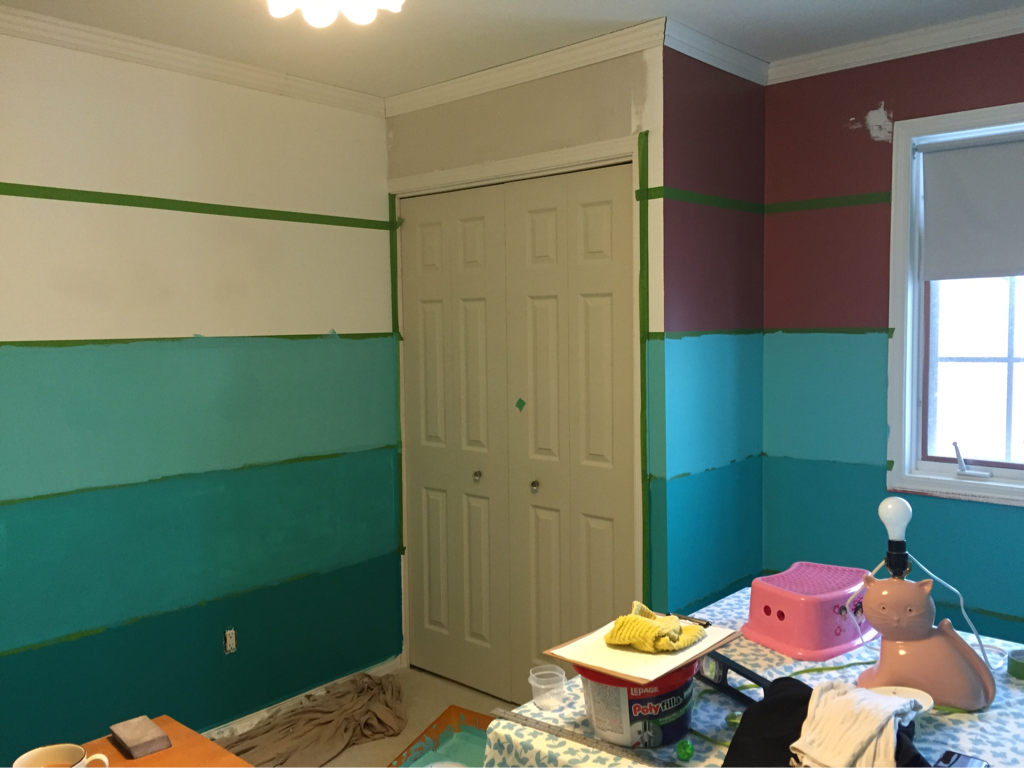
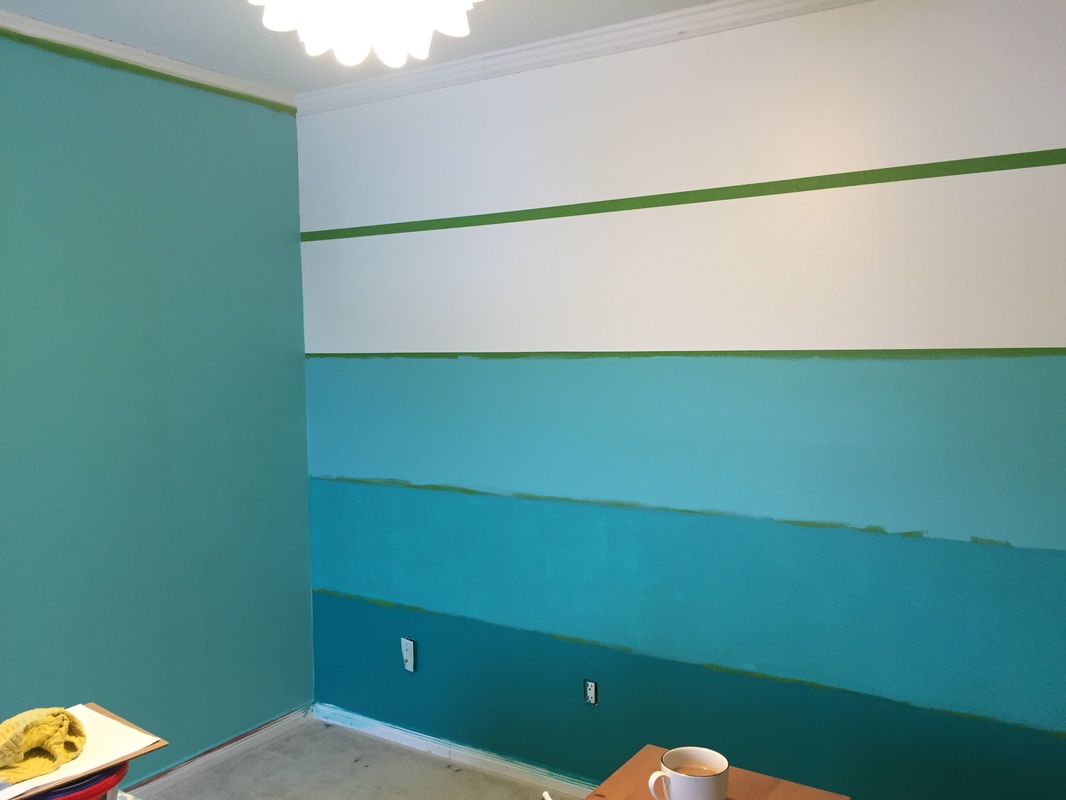
I then painted the walls of the house using left over home latex paint.

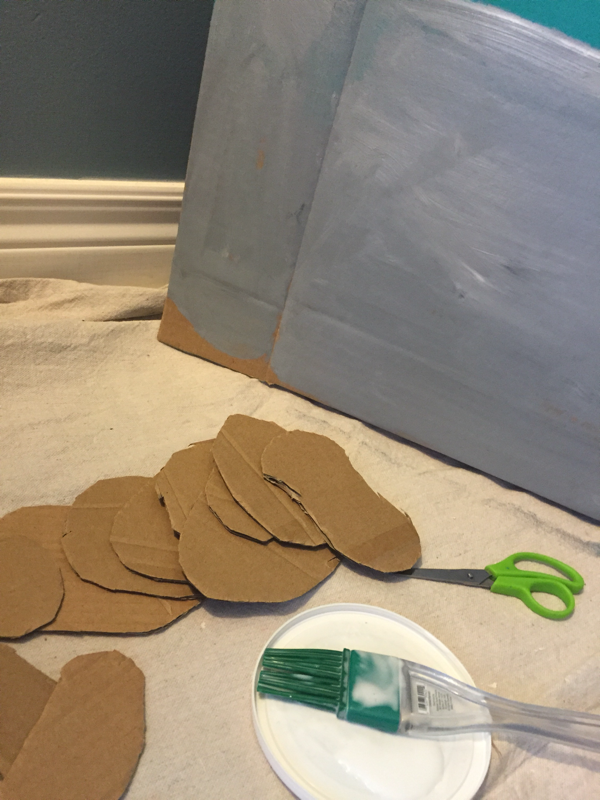
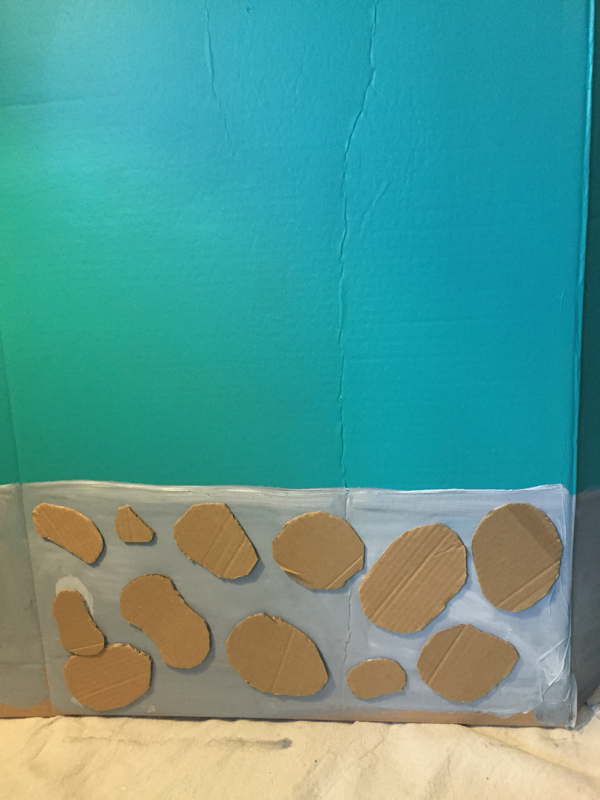
I also cut up strange rounded pieces to immigrate stones for the bottom of my house. I then glued them to the bottom of the house and tried my hand at faux stone...

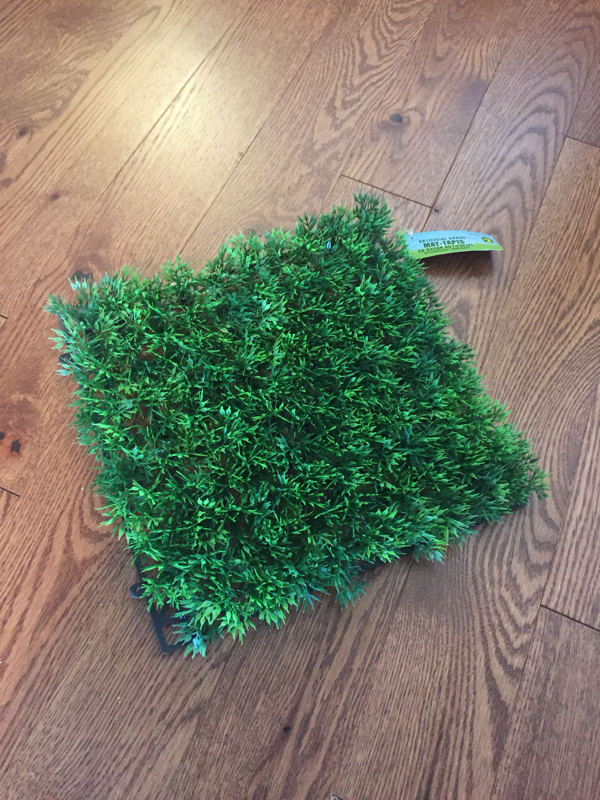
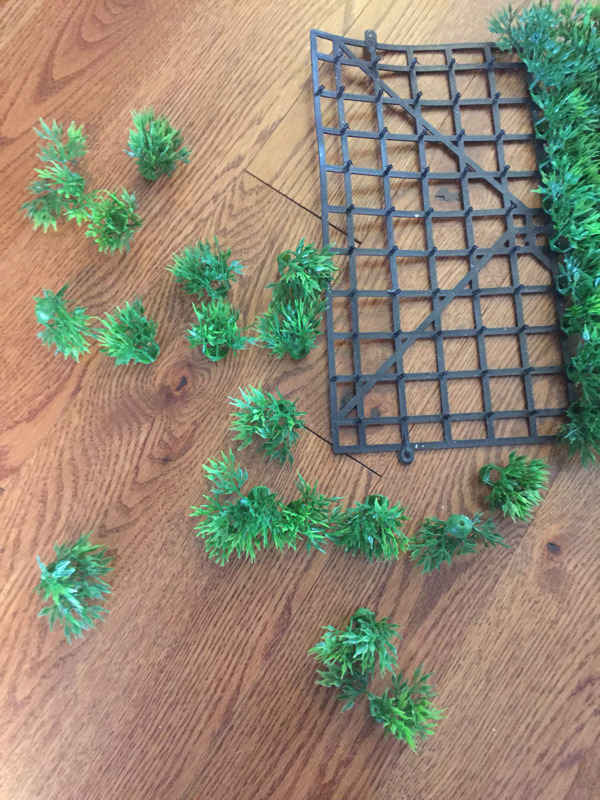
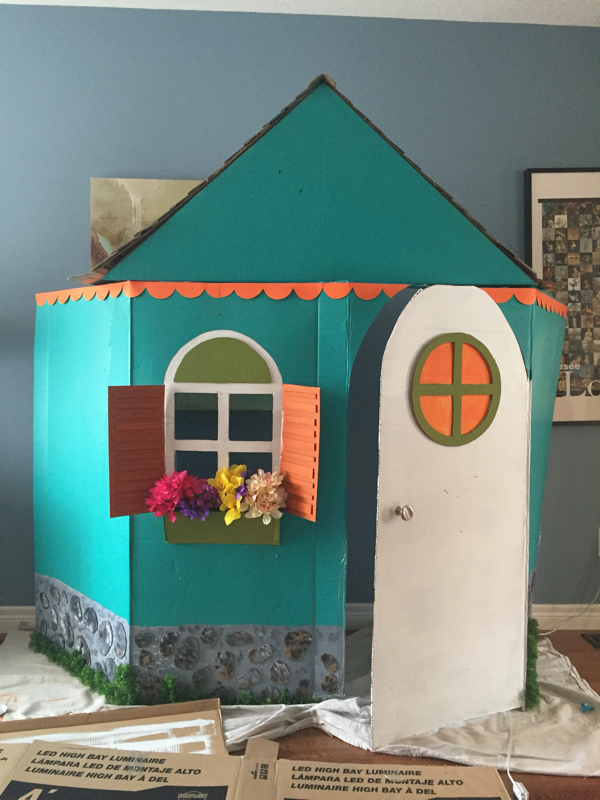
I found some fake grass tiles at my local dollar store. I took them all apart and then used a glue gun to glue them at the bottom of the house to imitate grass.

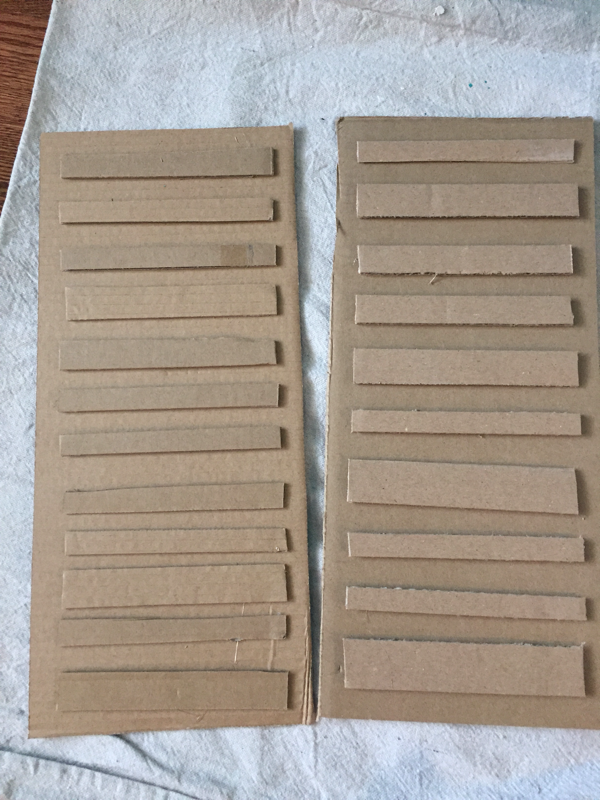
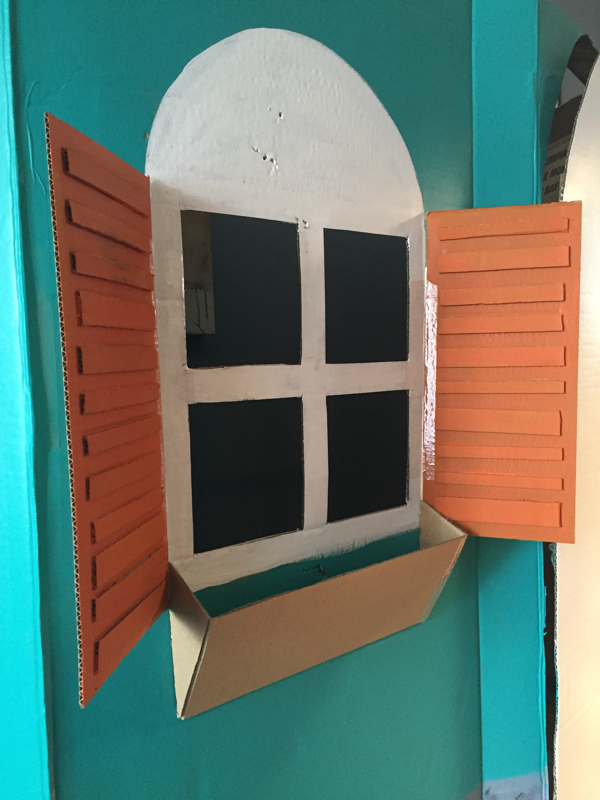
I cut two large rectangles the height of the window, glued mini strips of cardboard to each of one, glued them on either side of the window and then painted them, creating very simple shudders.

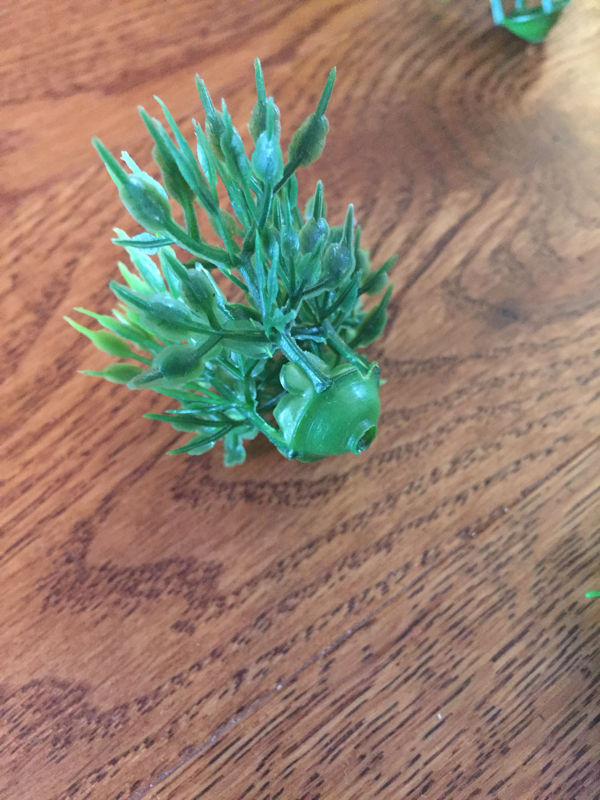
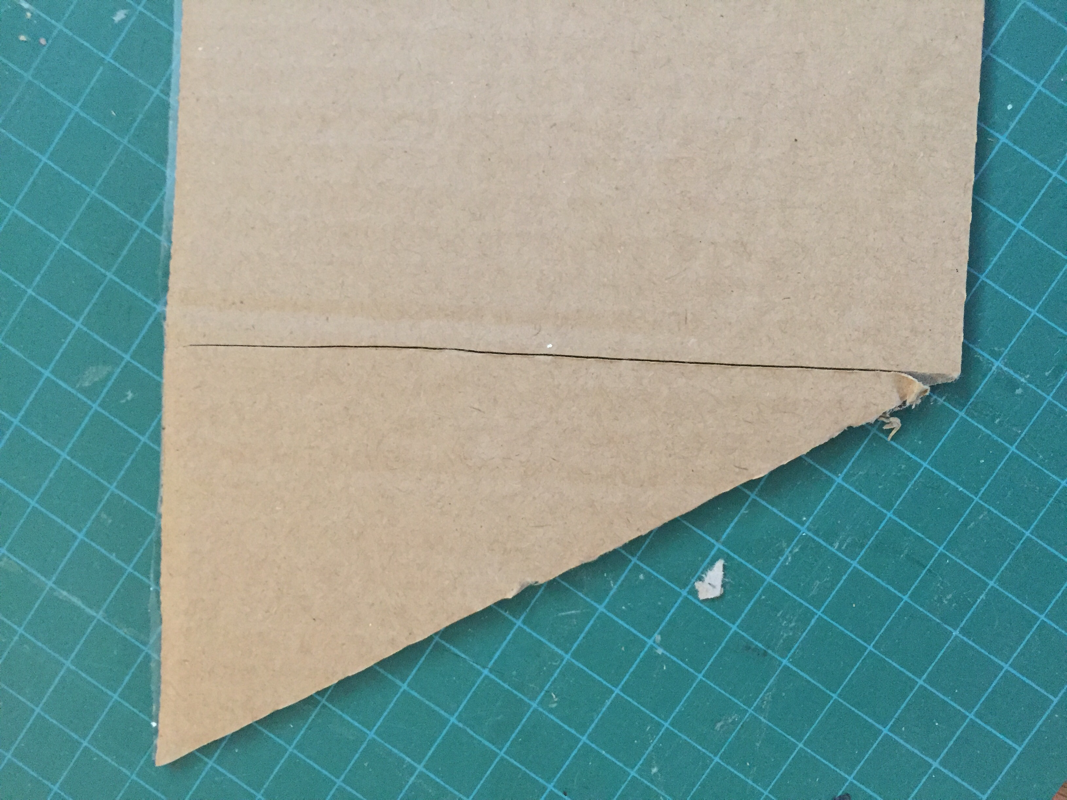
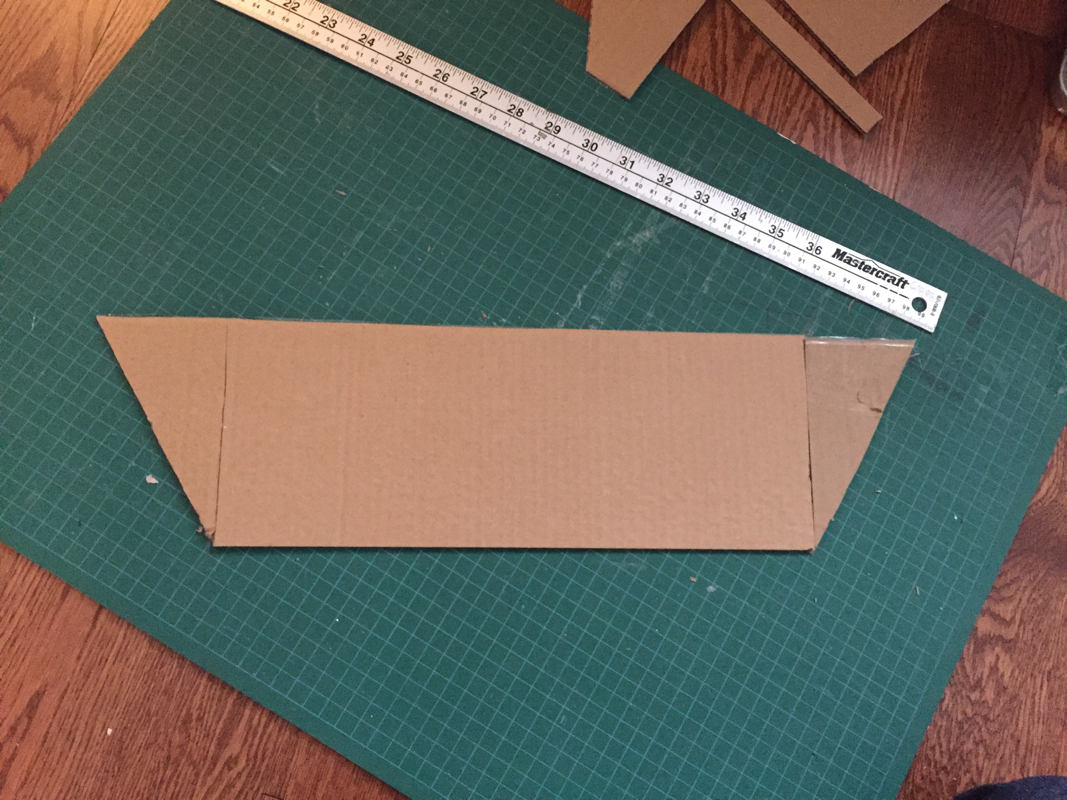
I used another piece of cardboard and cut it in such a way that I created a windowsill flower box. Painted it. Bought dollar store plastic flowers and glued them in side the box.

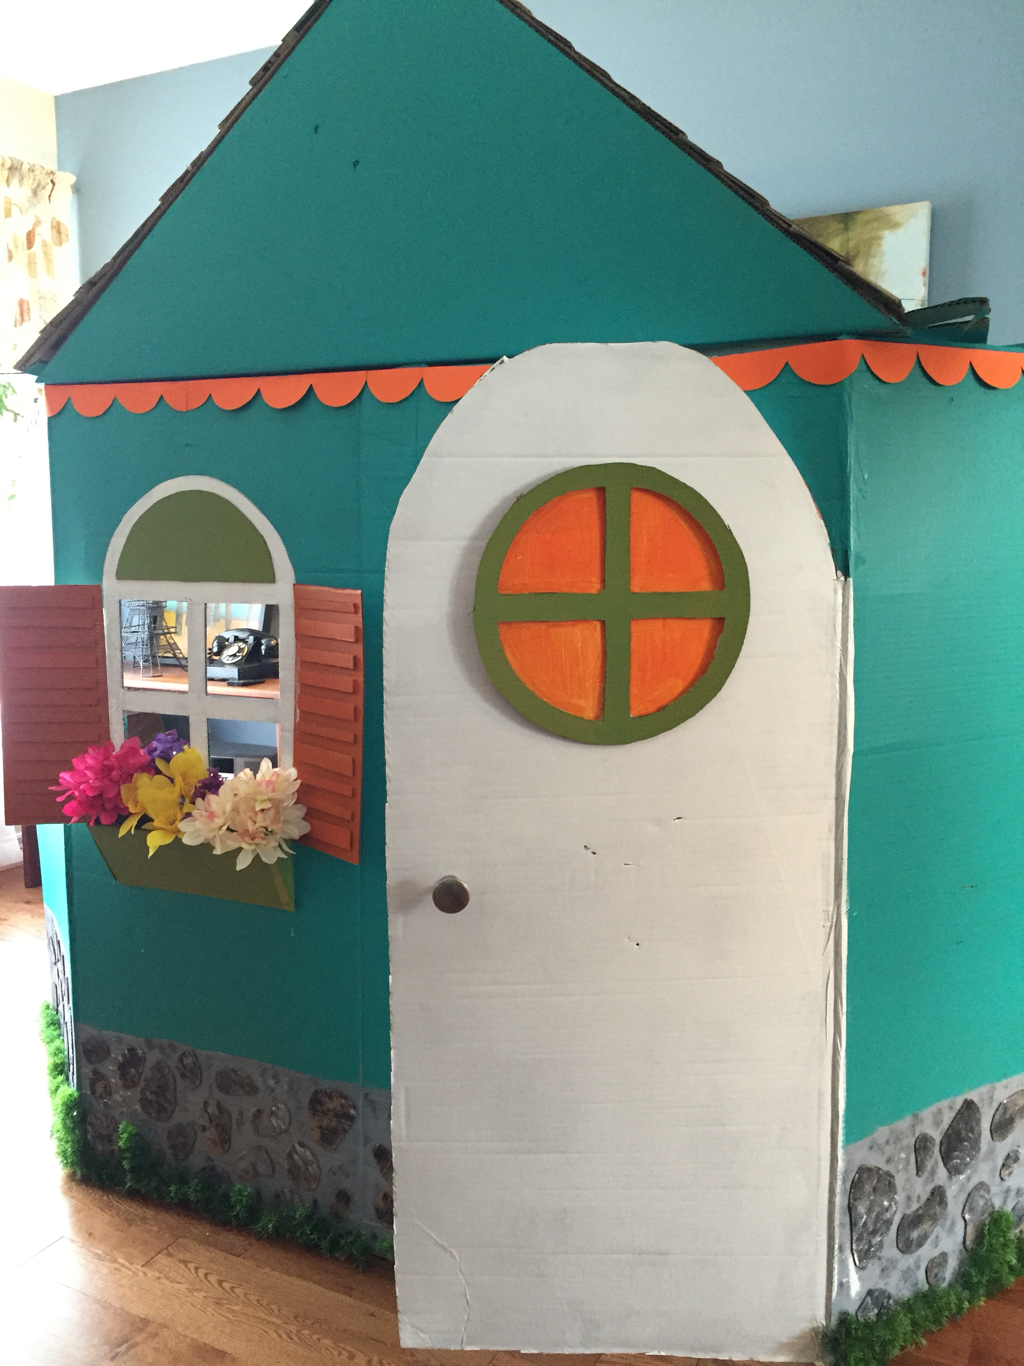
I then completed the house by adding simple details, attaching the roof and painting anything that needed to be painted.

Voilà!
Picture

Castle

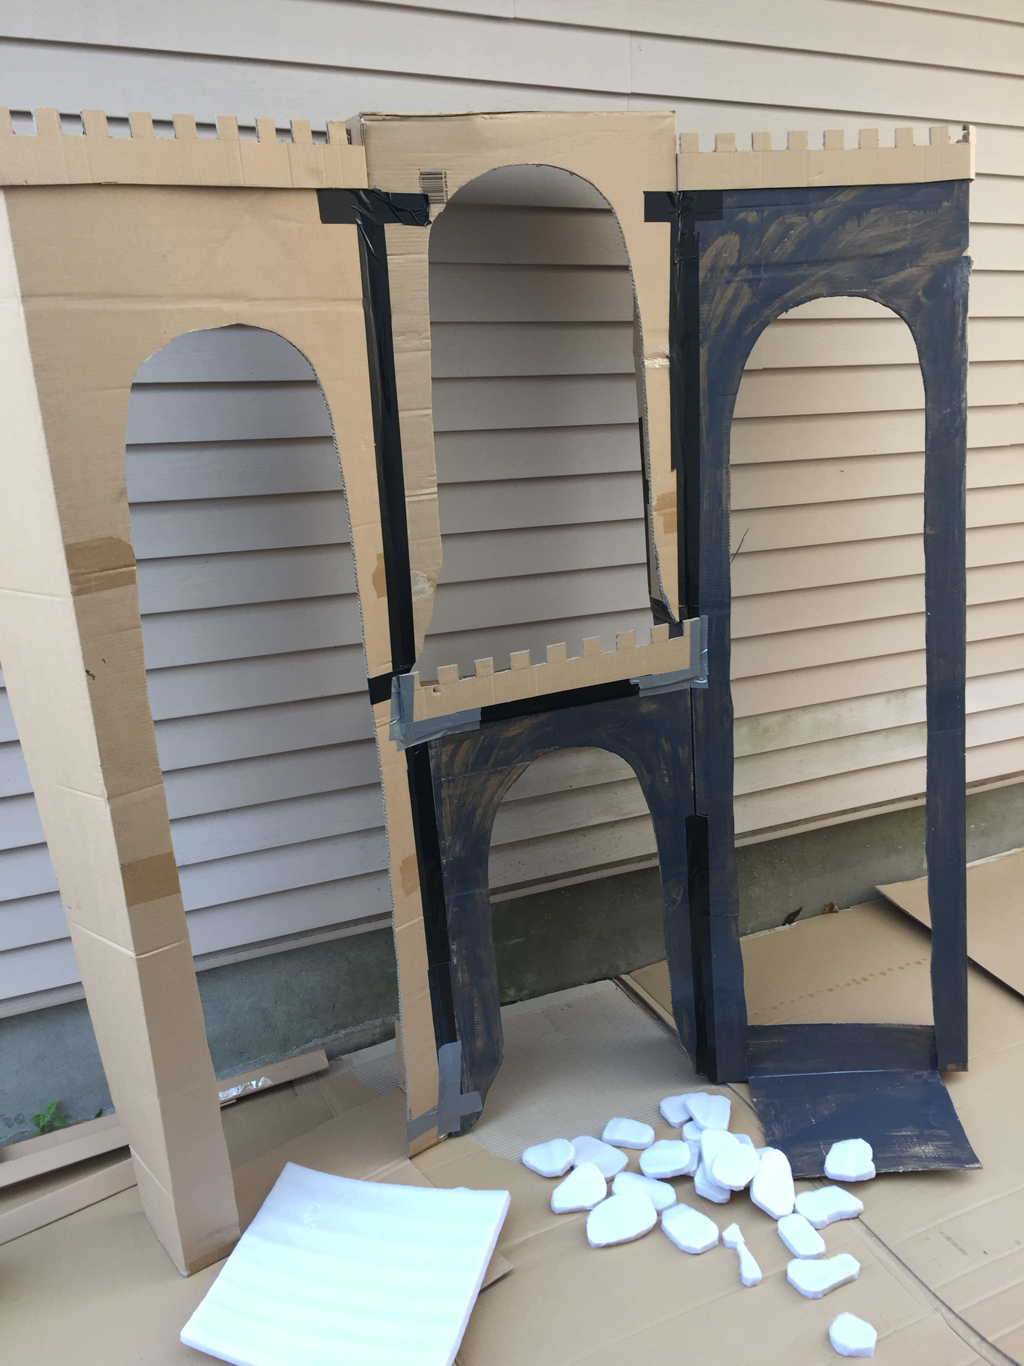
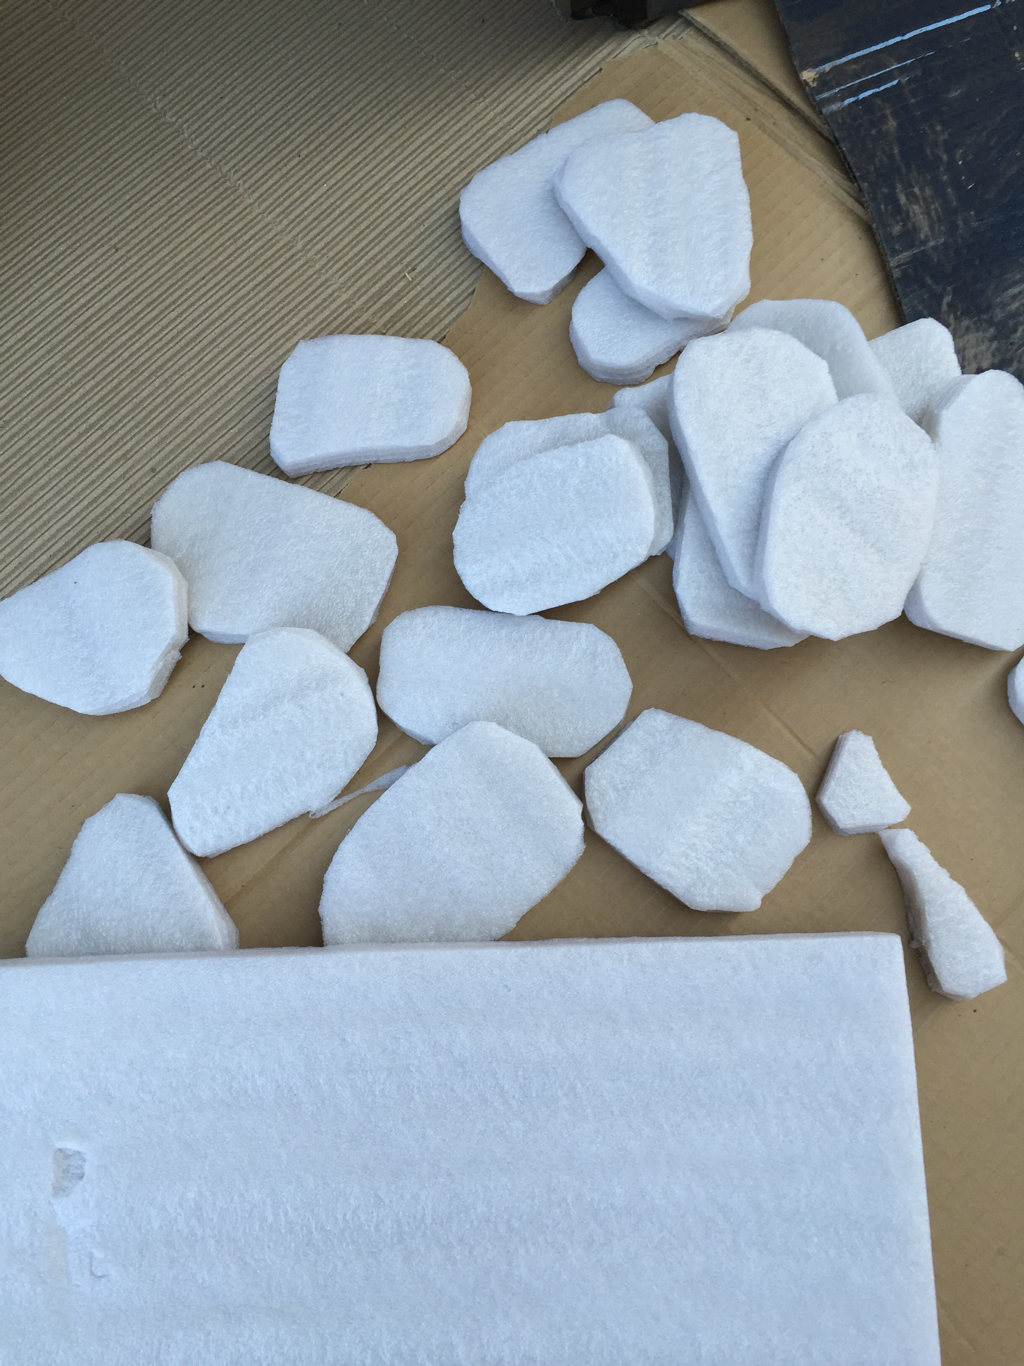
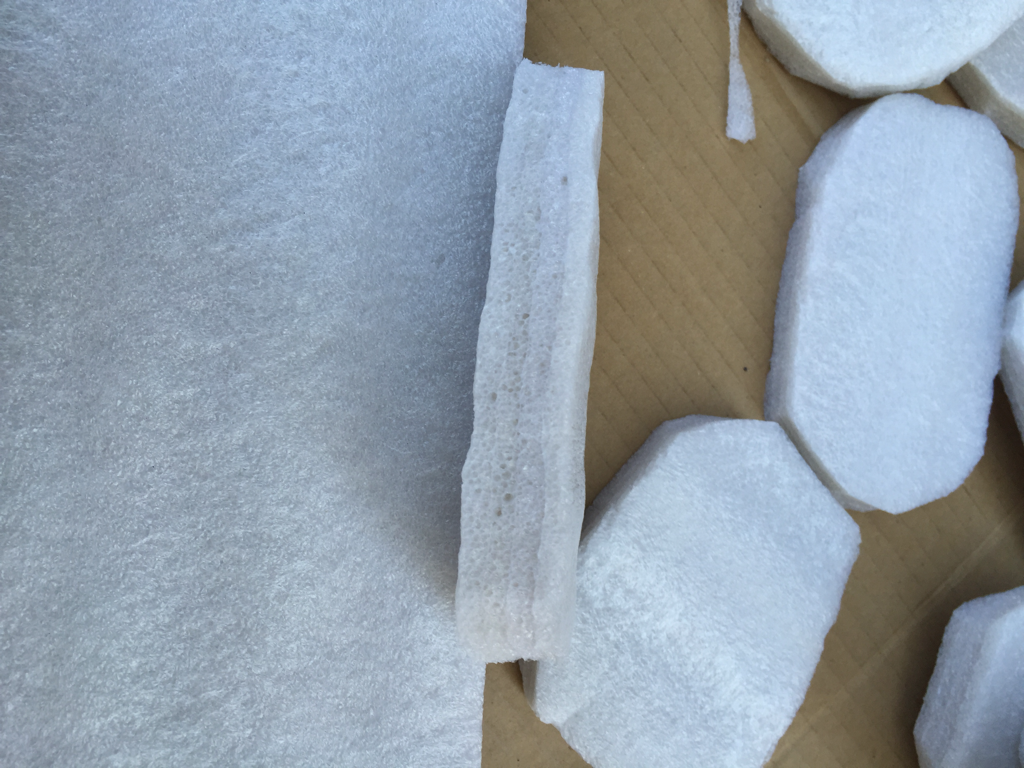
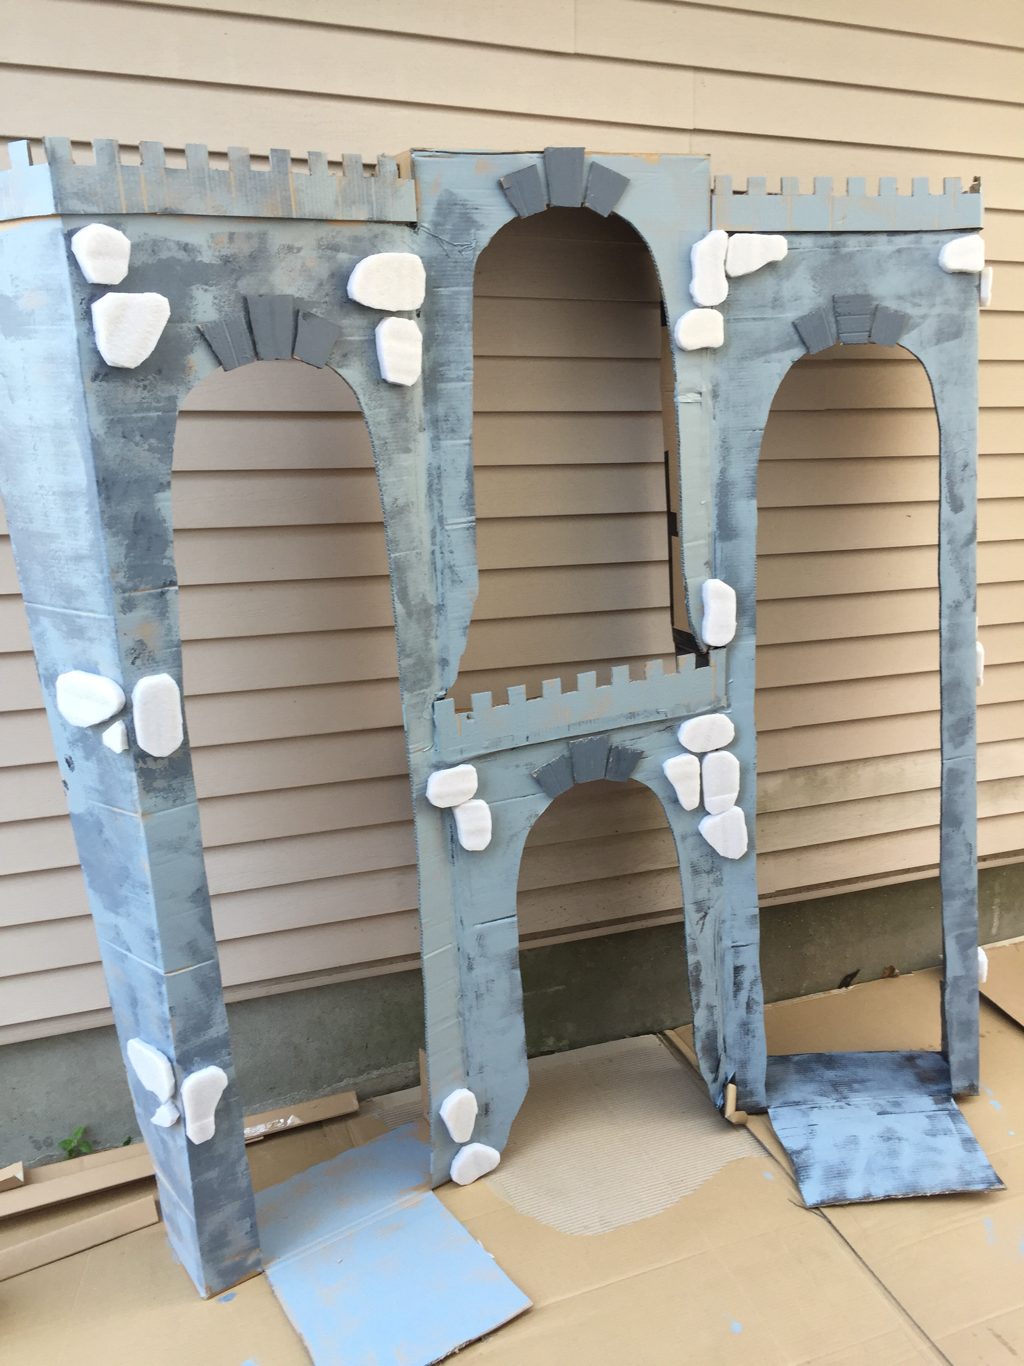
Using the largest cardboard boxes I could find I cut out three arches, applied tower details to the two side arches and then added cardboard and commercial packing foam (comes in sheets) stone cut outs to the entire surface. I left two large cardboard pieces in each of the end arches to allow placement of set weights. These weights allowed the castle to remain up right during the play.

I painted every inch of cardboard in different shades of grey and tried my hand again at faux stone painting.

The result surprised even me. This actually looked cool to the 8 year olds.
Picture
Picture
Picture
Picture
Picture
0 Comments

Back to the future...

12/18/2017

0 Comments


DIY - Time Machine

My eldest daughter was in a local play last spring and they needed a time machine. I decided to offer my help in making a simple DIY time machine using a moving box, repurposed items around the house and a few second hand purchases.

First I spray painted the box in metallic grey and black. Used a bronze spray paint to add rusted and antique like details.

Then I glued anything I could find around the house that was electronic in nature and defective. An old keyboard, old wires, unused d-link system, broken radio, calculators and any other items I could get my hands on. Some I glued as is, some inpainted. I used different sized bottle caps, spray painted them various colours and glued them to box to act like leavers and buttons.

I then printed gears and other steampunk type images including a clock and various computer screens. I meticulously cut them out, glued them to heavy cardboard and then glued them to the box.

Lastly I used an old defective round tap light. I used an old red nail polish I no longer used and painted the lens part of the light with it. The remainder of the light was spray painted in metallic grey. I then glued it to the top of the box as this was going to be the infamous red button that activated the machine.

Apart from drying time and cutting the gears that took the most time, this was a simple project and turned perfect for the play.

Picture
0 Comments

SPY KIT

12/18/2017

0 Comments

 
This year I wanted to not only purchase new toys my children wanted for Christmas, but also make something for them. A toy/activity based on their current interests and would allow them to use their wonderful imagination. My children are four years appart and sometimes getting them to play together can be difficult. The idea behind this gift was mainly to allow them to enjoy their personal interest together.

I created 2 kits: a spy kit for my youngest and a scientist kit for my eldest. I made them using recycled items purchased from the local second hand stores, used items (items we had around the house that could be repurposed) and a few new items.

Here is the Spy Kit
Picture
SPY BRIEFCASE : I found this crayola case at my local second hand store. I then found a couple of cool clipart image during a google image search and added it to the front of the case using washi tape. Main image was found here: http://laoblogger.com.

CASE FILES

I found two fantastic templates for police case files and for fingerprint sheets (French version), printed them off a few times and added them to file folders. I also used google image searches for basic Top Secret, spy and fingerprint clipart, which I printed and glued to the file folders and envelopes.

I cut envelopes to the right size and glued them to the interior of some of the files. One holds passport and visas to allow her to pretend she is from different countries. I found different passport templates on the web, I then added my daughter's photograph and personal information into each of the templates. I printed each template, cut to size and then laminated them.

Another file and envelope holds decoders (second version) which I also found while doing random searches on the web via google or Pinterest. I printed them, cut them according to the instructions, laminated them for durability and then assembled them.
Picture
Added a Spy diplomat, which I also laminated.
Picture
I created Spy ID badges using templates on the web. French version found here. Pasted my daughter's photo, added the required information, printed and laminated. Slipped them in old ID holders I had lying around the house.
Picture
Picture
I found this amazing iPad case with integrated keyboard at my local second hand store for a couple of dollars. I then found images of iPad main screens and fictional spy computer screens, printed them and laminated them. This will allow my daughter to change the screen of her spy computer by switching laminated images.
Picture
I also reused this old Car DVD/TV case which was lying around our basement, as a spy gear carrying case. I found most of the gear at my local second store, as these toys are from the 2006 and the 2014 McDonald spy promotion.

I also added repurposed item from around our house such as a calculator, and old lock and key, a small container for fingerprinting, a make up brush to dust on the powder and ink for fingerprint taking.
Picture
Picture
Finally I added a few extra items that either had a round the house or purchased at my local second hand store. I added a flash light, pens, note pad for note taking, binoculars, blank envelopes, stickers, a few masks, black gloves and tweezers.

I added all the files I created and voilà, hours of make believe fun!
Picture
0 Comments

DIY Kit - Scientist Kit

12/17/2017

1 Comment

 
This year I wanted to not only purchase new toys my children wanted for Christmas, but also make something for them. A toy/activity based on their current interests and would allow them to use their wonderful imagination. My children are four years appart and sometimes getting them to play together can be difficult. The idea behind this gift was mainly to allow them to enjoy their personal interest together.

I created 2 kits: a spy kit for my youngest and a scientist kit for my eldest. I made them using recycled items purchased from the local second hand stores, used items (items we had around the house that could be repurposed) and a few new items.

Here is the Scientist Kit

Science Notebook

Picture
I used a notebook I found at my local second hand store, a printed image and some washi tape.

I found this beautiful image off a google search. It's from the webpage for Harriet G. Eddy Middle School in California.

Scientific Folders and Experiments

I found some observation sheets on the web from (http://cabriolesetcacahuetes.blogspot.com/2015/04/fiche-dobservation.html?m=1), added them to decorated used file folders and added more washi tape for decorations.

I also found a few simple home experiments and added them to two more file folders. I found my French ones here: http://www.petitesexperiences.com

I also added two envelopes with special experiments. One that is placed in a Top Secret envelope: How to make invisible ink. The other is in a what seems like a very dangerous experiment, which has a how to build simple fire rockets using matches. Also from Petites Experiences website.

Samples and Specimens

I found an old tin at my local second hand store and bought a few small containers from my local dollar store. Decorated and added to the kit.

Scientist ID Badge

Picture
I found an old camera case and repurposed it as a take along for experiments. Added a cool ID Badge. Found a very cool image during a google image search ( www.bbc.co.uk ).

The Final Kit

Picture
Picture
Added things from around the house and repurposed them for the kit. A calculator, pens, funnels, sand timer, spray bottle, a measuring tape, candles and also added a few new items such as a magnifying glass, measuring spoons, safety goggles and two new small commercial scientific experiments.

I placed everything in an old boot box and added a decorative sign and voilà!
Picture
1 Comment

Our Awesome Vet Clinic!!

4/17/2016

1 Comment

 
Picture
My girls love to play with their plush animals and like to pretend that they are sick and need to be taken care of.

So I headed to my local dollar store and spent 40$ on various items and transformed our EXPEDIT bookcase from IKEA into a Veterinarian Clinic for my little ladies!
Picture
I placed small plastic baskets in some of the cubbies of the bookcase and filled them with green or brown coloured crèpe paper. I added 1 or 2 small bowls in each basket for "food" and "water". I purchased pompoms for "food" and blue tissue paper for "water". Added a small sign at the top of each cubby to write down the animals name.
Picture
Picture
Picture
Picture
Picture
For some of the cubbies I created cages. I cut out "cage fronts" out of cardboard and added duct tape to one side to act as the hinges and added Velcro to the other side, so that the cages could open and close.
Picture
Picture
Picture
Picture
Added decorative tape to random small containers for "medications" and medical supplies.
Picture
Picture
Added our Doctor type tools to the play area to take care of the animals.
Picture
I setup a table for the administrative duties of the clinic. A small cash register, calculator, note pad, an X-ray machine (plastic container with a tap light inside), telephone, pens etc.
Picture
Added another table for checkups and bath time. Added tissue paper to make water and added soap, shampoo, brushes, small towel, etc to take care of the animals.
Picture
And last but not least I added a waiting area for all the patients! This project was a huge success and my girls are thrilled to be "real" veterinarians!
Picture
1 Comment

Movie Night Birthday Party 

4/16/2016

0 Comments

 
An underwater themed birthday party yet again for my eldest. We even added an outdoor viewing of Dolphin Tail.
Picture
Picture
Simple decorations and a simply decorated cake kept the costs low and easy to do yourself.
Picture
All guests were asked to bring a pillow and a blanket to keep warm during the movie. Each guest received a juice box, some popcorn and small variety of candies.

Turned out awesome and the birthday guests adored it. Couldn't ask for anything more!
0 Comments

DIY Rey Costume from Star Wars: The Force Awakens

4/12/2016

1 Comment

 
This is Rey, the newest hero from Star Wars: The Force Awakens. I was unable to find costumes for two daughters, so I decided to make them myself.
Picture

Rey's Sleeves

Rey's sleeves are made of what look like bandages in the movie, but that seemed a little to difficult for a child to put on.  I needed something easy to put on and to take off.  I found this pillow sham at my local thrift store for 1,99$ and thought not only is the colour good, but the texture would be perfect for this project.
Picture
First thing I did was measure the length of my daughter's arms and cut a straight line across the sham (middle vertical cut below). Then I measured my daughter's wrists and upper arms, and cut at a diagonal (upper cuts below).
Picture
This is the reverse of one sleeve. I then sewed the unfinished edges.  Next I folded the fabric in half, unfinished side up. Sewed the length of the fabric, creating a closed sleeve cuff.  Then put the fabric right side up and voilà!
Picture
The top of the picture below is the wrist part of the sleeve (slightly narrower) and the bottom is the upper arm part of the sleeve. Repeated the same steps for the other sleeve.
Picture
Picture

Rey's Belt and Satchel

I purchased a small faux leather purse and a belt from my local thrift store for 9$. I cut off the strap. I then placed the belt on the back of the purse. I marked the width of the belt in four locations, as shown below. I proceeded to cut two openings and then inserted the belt.
Picture
Picture
Picture
Picture
Picture
Picture
Picture
Picture

Rey's Leather Cuffs

I also purchased a leather belt for 6$, it had great details and  knew it would be perfect for the costumes cuffs.
Picture
I measured my daughter's wrists (leaving extra room for her to be able to pull the cuff on and off without undoing it). and cut the belt as per the lengths needed. I bought snaps from my local hobby store and installed two snaps for each cuff.
Picture
Picture

Rey's Panel Wraps

I found the perfect material for the panels in the drapery section of the thrift store. A one panel drape, 60"x84", in the perfect colour and fabric for 1.99$! Can't beat that! I then folded the panel lengthwise and cut along the creased edge.  I then folded each new panel lengthwise again and cut along the folded edge, giving me 4 panels that are 15"x84".  I cut off the top part of the panel with the metal circles.  I then finished all the sides of each panel by sewing the edges.  I did this on 4 panels (I have two daughters...).
Picture
Picture
Picture
I draped two panels on either side of my daughter head and adjusted the height so that it was not to low.  I then gathered the front panels together at the height of her waist.  Using a needle and thread I sewed the gathered section.  At the back, instead of gathering the fabric of the panels, I crossed the panels and tied them using leftover fabric. The panels were a bit too long at the back, so I cut some off and re-sewed the edges.
Picture
Picture
I also decided to gather the fabric of each panel at my daughter's shoulder level, this way the panels would stay gathered and have less chances of slipping off. Once finished, my daughter had only to slip on the panels over her head and tie the belt to keep everything in place.
Picture
Picture
Picture
Picture
Picture
Picture
Picture
1 Comment

DIY Lightsaber

4/9/2016

0 Comments

 
Simple and inexpensive DIY light up lightsabers

Bought bubble wands (3$) and metal flashlights (3$) from the dollar store. Removed the cover of the bubble wand ( this part can be thrown out) poured out the bubble solution, rinsed it out and then let it dry. Next, I taped the opening of the wand to the top (where the light comes out) of the flashlight. I taped it with a few layers of black duck tape to make sure it stayed in place. Decorate the flashlight with bits and pieces of black and red duck tape and voilà, took 10 minutes to make!

​Idea from Lemon Lime Adventures (​http://lemonlimeadventures.com/diy-lightsaber-really-works/#_a5y_p=4301897)
Picture
Picture
0 Comments

Under the Sea Themed Bedroom

3/5/2016

1 Comment

 
My daughter looked through Pinterest with me and decided she wanted Ombre walls in her bedroom for an underwater themed room.  I was up to the challenge!

​I measured the wall height and divided the wall into 5 equal parts.  We headed to Home Depot and chose our paint colours.  We chose the P450B palette.  I decided to purchased 1 gallon of P450-6 Tropics, 1 gallon of P450-4 Hidden Sea Glass and 1 gallon of plain white. 
Picture
Picture
We painted the lower part in the darkest colour, P450-6 and painted the middle section in P450-4.  I then mix equal parts P450-6 and P450-4 together in an plastic container and painted the second part in this new colour. 
Picture
Picture
I then mixed equal parts of P450-4 and white paint in a separate container and painted the fourth section. Originally, I was going to paint the fifth section white, but it looked funny, so I added just a little P450-4 to give it a little colour.
Picture
My husband built a headboard with simple panelling and reclaimed wood. Once assembled, I white washed it the easy way (mixed white paint with water - about half and half). I then drew a tail detail onto paper, cut it out, and traced it onto the headboard. I then painted it in, using the darkest colour P450-6.
Picture
Picture
I bought the bedding below from Bed, Bath and Beyobd. Bought two white ALEX pedestals from IKEA and bought a butcher block countertop.
This is it the final product, but it's a start. More to come!
Picture
Once all the painting was completed we added some cork flooring.
1 Comment

Masha and The Bear Birthday Party

2/22/2016

3 Comments

 
My youngest daughter wanted a Masha and The Bear birthday party for her 4th birthday. Only issue is, this is a Russian show that plays on Netflix, so I could not find anything commercial to decorate our house for the party!  I had to improvise...

​One of my daughter's favourite episode is Laundry Day, so I decided that we would decorate our house with cut outs of Masha's different outfits, just like Bear did for her every time she got dirty.  This was the main focal point of the party!
Picture
Picture
Picture
I used a section of fake grass that I purchased from the rolled carpet section of The Home Depot.  Used it as a table runner and decorated it with lots of fake flowers we got at the dollar store. 
Picture
Picture
Picture
Used plastic dollar store table clothes to make a ceiling detail.  I cut each table clothes lengthwise once or twice and then used push pins to install the pieces.  Taped the other end to the light fixture and then wrapped a leftover piece of clothe to hide the tape.
Picture
Picture
adopt a bear were our loot bags. These were a big hit! Idea of the basket came from Valentina Pollicino (https://www.pinterest.com/vpollicino/masha-and-the-bear-birthday-party/)
Picture
Picture
How I made the baskets using felt, brown paper and dollar store boxes.
One of the games we played. Bought dollar store spoons and painted the handle with nail polish!
Picture
Our bear craft!
Picture
Picture
For the cake, I wanted something easy and simple.  I ordered Masha and The Bear bath toys directly from Moscow on Amazon and used them as cake toppers.  Pretty cute!
Picture
Picture
3 Comments
<<Previous

    Archives

    April 2016
    March 2016
    February 2016
    September 2015
    August 2015
    September 2014

    Categories

    All

    RSS Feed

Proudly powered by Weebly